Category: software-development

Software development is the process of conceiving, specifying, designing, programming, documenting, testing, and bug fixing involved in creating and maintaining applications, frameworks, or other software components. Software development involves writing and maintaining the source code, but in a broader sense, it includes all processes from the conception of the desired software through to the final manifestation of the software, typically in a planned and structured process. Software development also includes research, new development, prototyping, modification, reuse, re-engineering, maintenance, or any other activities that result in software products.

  • iOS-iPadOS app store submission checklist and how to

    iOS-iPadOS app store submission checklist and how to

    When you are ready to submit your app to App Store for TestFlight or App Store you want to make sure few things are available to you.

    1. First you need a developer account or an Apple ID which has privilege to developer resources ask your Team Admin for more help.
    2. There are two websites one https://developer.apple.com/account/ for creating app bundle, certificates and another one https://appstoreconnect.apple.com where you create your App and upload its assets and binary.
    3. After login to https://appstoreconnect.apple.com create an app first.

    In this step you need few more information.

    4. After creating the app you can now go to app detail page where you will add more information.

    Click on the left sidebar Prepare for Submission and add following information

    Version Information

    • Promotional Text
    • Description
    • Keywords 
    • Support URL
    • Marketing URL (Optional)

    General App Information

    • Version
    • Copyright

    App Review Information

    If your app needs username and password to access then you need to give working username and password here.

    5. Go to App Information under General. Here you can set your app Localizable Information, app category(primary and secondary), app content rights and age rating. Finally there is a license agreement, usually you don’t have to edit it.

    6. Click on the Pricing and Availability link and set your app’s pricing, if it is free then you don’t have to do anything. Here also you can choose which app store your app will be available, usually you don’t have to do anything here.

    7. Set your app privacy information from App Privacy

    These are the main things you need to get your app on the app store besides a well tested binary you develop on your Xcode.

    Spread the love
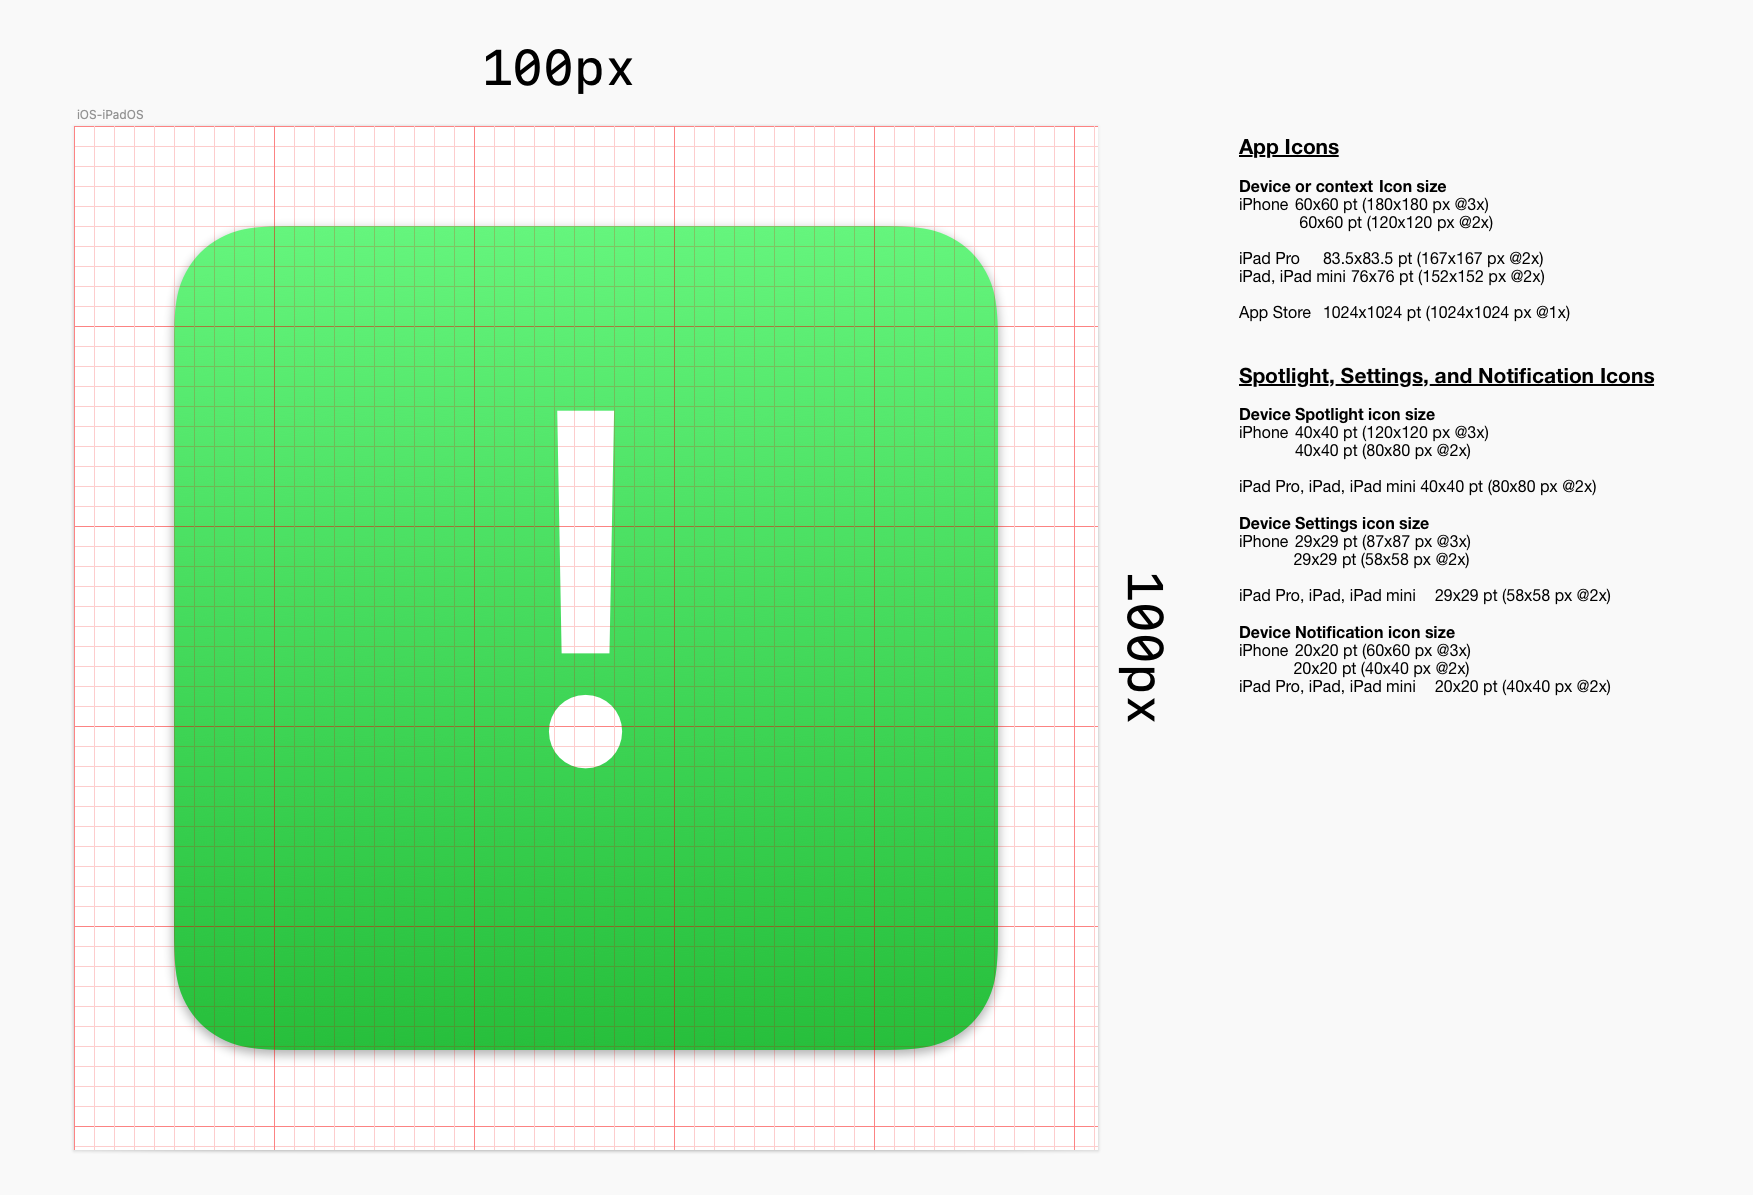
  • iOS-iPadOS app icon sizes with sketch file

    DeviceIcon Size
    App Icons
    iPhone60×60 pt
    20×120 px @2x
    180×180 px @3x
    iPad Pro83.5×83.5 pt
    167×167 px @2x
    iPad, iPad mini76×76 pt
    152×152 px @2x
    App Store1024×1024 pt (1024×1024 px @1x)
    Device Spotlight icon size
    iPhone40×40 pt (120×120 px @3x)
    40×40 pt (80×80 px @2x)
    iPad Pro, iPad, iPad mini 40×40 pt (80×80 px @2x)
    Device Settings icon size
    iPhone29×29 pt (87×87 px @3x)
    29×29 pt (58×58 px @2x)
    iPad Pro, iPad, iPad mini29×29 pt (58×58 px @2x)
    Device Notification icon size
    iPhone20×20 pt (60×60 px @3x)
    20×20 pt (40×40 px @2x)
    iPad Pro, iPad, iPad mini20×20 pt (40×40 px @2x)

    Download sketch file

    Spread the love
  • My thoughts on SwiftUI

    My thoughts on SwiftUI

    I recently completed one medium size SwiftUI project and, it was a wonderful experience with MVVM architecture. I took some time to grab everything, but my struggles been paid off.

    I no longer want to do a new project on the storyboard. You should not do it either. No fear just start you will finish it soon.

    Storyboard was some improvements than single xib file, at least you did not have to open many tabs for xib which always slowed down Xcode. But it was always like this on Apple platform since Xcode 3.2, developing app means you have to handle xib file.

    I always liked Android’s XML way than a xib file on a Xcode.

    I never liked the Auto Layout either, but it always worked on all devices. But I hated it when I had to break a few constraints to add a few more to make space for a new TextField or Image. It has never been easy.

    The most useful thing about SwiftUI that how easy it is to create a view and reuse it anywhere if you can make it in that way. The @Binding and @State are really helpful.

    And the ViewModel updates a model which your view observes always. So my ViewModel has a property @Published whenever it changes its all observers will get the update by calling the property @ObservedObject or @StateObject.

    The SwiftUI is very new but it is the best thing for app developers on Apple platforms. I even converting few more apps in SwiftUI in the coming months.

    Download a demo login app I’m working on from github.

    Spread the love