
Delivering a crash‑free experience across thousands or millions of devices requires more than plugging in a crash SDK. You need accurate symbolication, stable build artifacts, and real‑time metrics that highlight regressions before reviews or social media do.
This guide walks through a practical, founder‑grade setup:
- Build settings for DWARF & dSYM accuracy
- CI workflows to archive symbols and map builds to releases
- On‑device breadcrumbs and session context to speed triage
- Server‑side symbolication pipeline with examples
- Metric dashboards (crash‑free %, cohorts, release diffs)
We’ll use stock Xcode + command‑line tools, with example pipelines for Sentry, Firebase Crashlytics, and a custom symbolication service.
Goals
- Maximize “crash‑free users” and “crash‑free sessions” for each release
- Ensure all crashes symbolicate (no “unknown” frames) across arm64 and simulators
- Make regressions visible within minutes of rollout
- Keep artifact management boring and reliable in CI
Key Concepts
- dSYM: Debug Symbols archive containing DWARF info used to map addresses → function names + line numbers.
- DWARF: Debugging format embedded in binaries or dSYMs; required for readable stack traces.
- UUID (Build UUID/UUIDs): Unique identifiers per Mach‑O slice used to match crash reports to the correct dSYM.
- Symbolication: Translating raw addresses from crash logs into human‑readable stack frames.
- Crash‑free rate: 100 × (1 − crashes / sessions) or users without crashes ÷ total users.
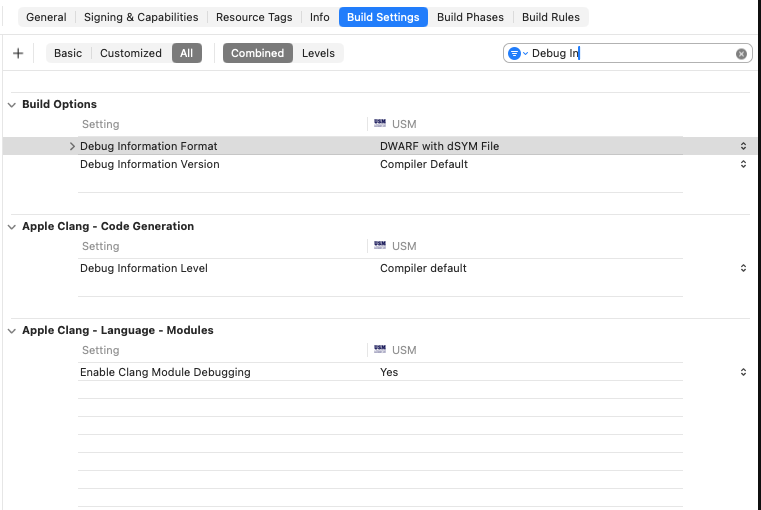
Xcode Build Settings for Reliable Symbols
In your target build settings:
- “Debug Information Format” (
DEBUG_INFORMATION_FORMAT):- Debug:
DWARF - Release:
DWARF with dSYM File
- Debug:
- “Strip Debug Symbols During Copy”:
Yes - “Strip Linked Product”:
Yes(but ensure dSYM generation remains enabled) - “Generate Debug Symbols”:
Yes
Example xcconfig snippet:
// Configs/Release.xcconfig
DEBUG_INFORMATION_FORMAT = dwarf-with-dsym
STRIP_INSTALLED_PRODUCT = YES
STRIP_STYLE = all
GCC_GENERATE_DEBUGGING_SYMBOLS = YES
ENABLE_BITCODE = NO // Prefer NO to avoid mismatched UUIDs on App Store recompile
Why ENABLE_BITCODE = NO? When bitcode is enabled, Apple may re‑compile your binary, producing different UUIDs. If your crash backend doesn’t fetch App Store recompiled dSYMs automatically, symbolication can fail. Many teams now disable bitcode for consistent UUID mapping.
Exporting and Archiving dSYMs in CI
Regardless of vendor, keep dSYMs under versioned storage keyed by release name and build number.
Example GitHub Actions step (Fastlane optional):
name: iOS Build & dSYM Upload
on:
  workflow_dispatch:
  push:
    branches: [main]

jobs:
  build:
    runs-on: macos-13
    steps:
      - uses: actions/checkout@v4
      - name: Xcode archive
        run: |
          xcodebuild \
            -workspace App.xcworkspace \
            -scheme App \
            -configuration Release \
            -sdk iphoneos \
            -archivePath build/App.xcarchive \
            clean archive
      - name: Export IPA + dSYMs
        run: |
          xcodebuild -exportArchive \
            -archivePath build/App.xcarchive \
            -exportPath build/export \
            -exportOptionsPlist ExportOptions.plist
      - name: Find dSYMs
        run: |
          find build/export -name "*.dSYM" -print
      - name: Upload dSYMs to Sentry
        env:
          SENTRY_AUTH_TOKEN: ${{ secrets.SENTRY_AUTH_TOKEN }}
          SENTRY_ORG: your-org
          SENTRY_PROJECT: ios-app
        run: |
          curl -sL https://sentry.io/get-cli/ | bash
          sentry-cli releases new $GITHUB_SHA
          sentry-cli releases set-commits --auto $GITHUB_SHA
          sentry-cli upload-dsym build/export
          sentry-cli releases finalize $GITHUB_SHA
Crashlytics upload example:
# Using Firebase Crashlytics upload-symbols script
bash "Pods/FirebaseCrashlytics/upload-symbols" -gsp "GoogleService-Info.plist" -p ios build/export
Custom storage (S3, GCS) with UUID manifest:
# Extract UUIDs and upload manifest
dwarfdump --uuid build/export/App.app/App | tee build/uuid.txt
aws s3 cp build/uuid.txt s3://symbols/app/1.2.3/uuid.txt
aws s3 sync build/export/*.dSYM s3://symbols/app/1.2.3/dsyms/
Reading UUIDs Locally
You can check which UUIDs your app contains per architecture:
dwarfdump --uuid MyApp.app/MyApp
# Example output:
# UUID: 12345678-ABCD-1234-ABCD-1234567890AB (arm64) MyApp.app/MyApp
Crashes must reference one of these UUIDs. If the UUID in the crash doesn’t match your dSYM’s UUID, symbolication won’t work.
On‑Device Breadcrumbs and Session Context
Crash logs become actionable when paired with app state:
- Active screen / feature flag / AB cohort
- Previous screen + elapsed time
- Network status, CPU, memory pressure
- User plan/tier (if applicable)
Lightweight Swift example:
import Foundation

struct Breadcrumb: Codable {
    let ts: Date
    let message: String
    let attributes: [String: String]
}

final class Breadcrumbs {
    static let shared = Breadcrumbs()
    private var store: [Breadcrumb] = []
    private let queue = DispatchQueue(label: "breadcrumbs.queue")

    func add(_ message: String, attributes: [String: String] = [:]) {
        queue.async {
            self.store.append(Breadcrumb(ts: Date(), message: message, attributes: attributes))
            if self.store.count > 200 { self.store.removeFirst(self.store.count - 200) }
        }
    }

    func exportJSON() -> Data? {
        queue.sync { try? JSONEncoder().encode(store) }
    }
}

// Usage: tie into navigation and key events
Breadcrumbs.shared.add("Opened Screen", attributes: ["screen": "Settings"])
Breadcrumbs.shared.add("Tapped", attributes: ["button": "Save"])
On crash, many SDKs allow attaching custom data. For a custom flow, persist breadcrumbs regularly:
func persistBreadcrumbs() {
    guard let data = Breadcrumbs.shared.exportJSON() else { return }
    let url = FileManager.default.urls(for: .cachesDirectory, in: .userDomainMask)[0]
        .appendingPathComponent("breadcrumbs.json")
    try? data.write(to: url)
}
Server‑Side Symbolication (DIY)
If you collect raw crash reports (Mach exception addresses or PLCrashReporter format), you can symbolize server‑side.
High‑level steps:
- Extract crash binary UUID(s) from the report
- Locate matching dSYM by UUID or release
- Use
atosorllvm-addr2linewith DWARF to map addresses → symbols - Render stack frames with file:line
Example: symbolize with atos on macOS runner:
# Inputs
APP_BIN="MyApp.app/MyApp"
DSYM_BIN="MyApp.app.dSYM/Contents/Resources/DWARF/MyApp"
ADDRESS="0x0000000100a3b9dc" # address from crash frame
UUIDS=$(dwarfdump --uuid "$APP_BIN")

echo "Binary UUIDs:\n$UUIDS"
atos -o "$APP_BIN" -arch arm64 "$ADDRESS"
# Or using dSYM directly: atos -o "$DSYM_BIN" -arch arm64 "$ADDRESS"
Using llvm-addr2line (Homebrew llvm):
brew install llvm
/opt/homebrew/opt/llvm/bin/llvm-addr2line -e "${DSYM_BIN}" -f -C 0x0000000100a3b9dc
Batch symbolication example (Node.js):
// tools/symbolicate.js
const { execSync } = require("child_process");
const path = require("path");

function symbolize(addresses, dSYMPath) {
  return addresses.map((addr) => {
    const out = execSync(
      `/opt/homebrew/opt/llvm/bin/llvm-addr2line -e "${dSYMPath}" -f -C ${addr}`,
    );
    return out.toString();
  });
}

const dSYM = process.argv[2];
const addresses = process.argv.slice(3);
console.log(symbolize(addresses, dSYM).join("\n"));
Run:
node tools/symbolicate.js MyApp.app.dSYM/Contents/Resources/DWARF/MyApp 0x100a3b9dc 0x100a3c120Release Mapping and Cohort Metrics
Tie crashes back to rollouts and user cohorts:
- Build → Release channel (TestFlight, phased, forced)
- Country, device class, OS version
- New vs. returning users
Schema example (SQL):
CREATE TABLE releases (
  id SERIAL PRIMARY KEY,
  version TEXT NOT NULL,
  build TEXT NOT NULL,
  commit_sha TEXT,
  created_at TIMESTAMPTZ DEFAULT NOW()
);

CREATE TABLE crash_events (
  id BIGSERIAL PRIMARY KEY,
  release_id INTEGER REFERENCES releases(id),
  uuid TEXT, -- binary UUID
  os TEXT,
  device TEXT,
  address TEXT,
  symbol TEXT,
  file TEXT,
  line INTEGER,
  user_id TEXT,
  session_id TEXT,
  country TEXT,
  ts TIMESTAMPTZ DEFAULT NOW()
);

CREATE INDEX ON crash_events (release_id);
CREATE INDEX ON crash_events (uuid);
Crash‑free metrics:
-- Crash-free sessions per release (24h)
SELECT r.version, r.build,
  1.0 - (SUM(CASE WHEN c.session_id IS NOT NULL THEN 1 ELSE 0 END)::float
        / GREATEST(COUNT(DISTINCT s.session_id), 1)) AS crash_free_rate
FROM releases r
JOIN sessions s ON s.release_id = r.id AND s.ts > NOW() - INTERVAL '24 hours'
LEFT JOIN crash_events c ON c.session_id = s.session_id AND c.ts > NOW() - INTERVAL '24 hours'
GROUP BY r.version, r.build
ORDER BY r.created_at DESC;
Real‑Time Triage: Alerts and Dashboards
- Alert on crash‑free drop > X% in Y minutes after rollout
- Alert on new top‑crash signature (hash of top 5 frames)
- Dashboard cards: crash‑free users/sessions, release diffs, top devices/OS, worst screens
Example alert logic (pseudo):
# triage/alerts.py
from datetime import datetime, timedelta

THRESHOLD_DROP = 0.03  # 3% drop
WINDOW_MINUTES = 30

# get_crash_free(release, window) -> float
# get_baseline(release) -> float, previous 7d mean

def should_alert(release):
    now = datetime.utcnow()
    window = timedelta(minutes=WINDOW_MINUTES)
    current = get_crash_free(release, window)
    baseline = get_baseline(release)
    return (baseline - current) >= THRESHOLD_DROP
Integrations: Crashlytics and Sentry Cheats
Crashlytics:
- Ensure
upload-symbolsruns for every distribution (Debug/TestFlight/App Store) - Turn on “automatic dSYM download” if using App Store recompiled binaries
- Use
CLS_LOGor custom keys for breadcrumbs
Sentry:
- Use Releases and Commits to correlate deploys
- Upload dSYMs via CI with
sentry-cli - Use “Grouping” and “Fingerprint” to tune unique crash signatures
Checklist for Crash‑Free at Scale
- [ ] Release:
DWARF with dSYM, Bitcode disabled or handled - [ ] CI: Archive + upload dSYMs per release, store UUID manifest
- [ ] App: Breadcrumbs with screen + action + environment
- [ ] Backend: Symbolication pipeline (atos/addr2line) by UUID
- [ ] Metrics: Crash‑free users/sessions, alerting on drops and new signatures
Appendix: Reading Apple Crash Logs Locally
Given a .crash log, verify UUID and symbolize a frame:
grep -E "UUID|Binary Images" MyCrash.crash
# Identify the app binary UUID and the address from Thread X crashing frame.

atos -o MyApp.app/MyApp -arch arm64 0x0000000100a3b9dc
If you only have the dSYM:
atos -o MyApp.app.dSYM/Contents/Resources/DWARF/MyApp -arch arm64 0x0000000100a3b9dcFinal Notes
Prioritize accuracy and boring reliability in artifacts. Make symbol uploads automatic, tie metrics to releases and cohorts, and keep actionable breadcrumbs. With this setup, you’ll find and fix crash spikes quickly — preserving user trust and App Store momentum.


